I’ve had this on my to do list for a few months now. This is in response to the massive LED cloud that was build for path.OS immersive in November 2019 ( video here ).
The process is simple… Use a hot glue gun to attach polyfil or some kind of “cloud-like” stuffing around a milk container. Place LEDs inside with a Wifi or Bluetooth controller, plug in, and then control the settings from your phone.
Here’s what you need:
- Hot Glue Gun and Glue Sticks
- Poly Fil or some kind of fluffy stuffing (got any stuffed animals laying around (NOT THE BEAD FILLED KIND).
- Plastic container, Milk containers or Frosted containers are the best IMO as they diffuse the LED light and provide a softer glow.
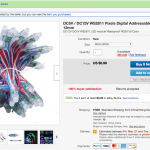
- 25 pixels 5V WS2811 or WS2812B RGB LED string lights ($6.35)
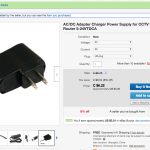
- 5V Power adatper (US $4.43)
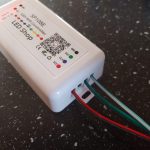
- LED Wifi or Bluetooth Pixel controller ($4-$12) (SP108E is Wifi SP105E and SP110E are Bluetooth, I recommend Bluetooth over wifi so you can connect with your phone while still having internet access).
- Cell phone, iPAD, or tablet to install LED shop app.
- (Recommended/Optional) White DC Extension Cable ( $3 for 2 Meters) I had a black already, but White matches the cloud.
If you order everything from China it should take 2-3 weeks for it all to arrive. You can spend 2x the price from a USA supplier; your choice.
You may already have a 5V power supply laying around your house which you can wire directly into the pixel controller. A USB cable will work too, but the wiring is different.
I recycle what I can around me as much as I can, which leads us to….
Step 1: Get a container.
Look at all these future clouds.
2. Cut container.
Now is a good time to put some fishing line or string inside or across the top. We will use this to suspend the cloud. I’m hanging from the power cord wrapped around some white string.
3. Hot Glue Polyfil to container.
4. Set up pixel controller and wiring.
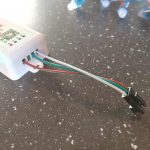
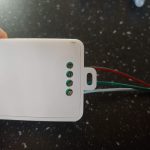
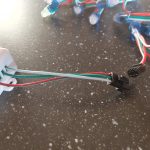
The controller should come with a tiny screw driver and a 3 pin JST connector. The LEDs came with their own 3 Pin JST connector. Make sure the colors line up after connecting.
- GND is sometimes Black or White Cable. Data (DAT) is almost always green, and + is typically Red
- Tiny screw Driver
- They connect!
If everything is working, insert it into the contain. Scatter the LEDs randomly for best effect, and add polyfil inside to space them out. Add more Poly fil on top to hide the wires.
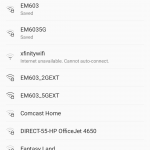
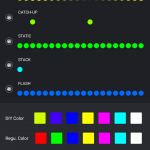
5. Setup the LEDs and connect to WIFI or Bluetooth on your phone.
Download the LEDShop LED app for Android or iOS.
- If Wifi version, connect to the controller via WIFI
- Make sure to set LEDs to WS2811 and this group only has 25 pixels
- Meteor seems to have a good lighting-like look
There are 25 Pixels (individual LEDs) in the strand of WS2811 5V LEDs that I purchased. You can use 12V LEDs, but you need to make sure that your power supply Voltage matches your LED voltage. The controller will work with either. Note: You may have to change the color order of the LEDs (i.e. you set the LEDs to Green but they turn Blue), just play with it and you’ll figure it out.
That’s it, really easy. I’m shocked to see people selling LED clouds on the internet for $100s of dollars. They are very inexpensive and quick to make yourself.
Leave comments if you have any Qs. Also, use the Brave web browser and tip with BAT if you feel like doing so 😉
