I thought it would be a good idea to document the process used for Cosmic Sound’s Altared event w/ Bary Center, J Butler, To Sleep At Night, Dilettante. It wasn’t my first time using a multiple projector/computer setup, but adding a PC and Live coding VJ into the mix needed a new workflow. There’s a video from the show below and if you’re interested in the process of sharing live VJing content across computers and operating systems read the entire post.
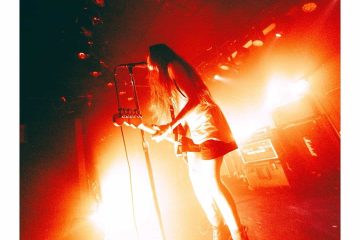
Here are some short video clips from Altared I co-VJ’ed with the awesome Char Stiles.
GLSL, Live coding VJing, Mac & PC, projection mapping, VDMX, Mad Mapper, Kodelife, Lumen App, Spout, Syphon, UVC HDMI Capture, four channel HDMI mixers, and fun!
That statement above says it all. Now I’ll go into the details.
As Char writes on her blog: ( http://charstiles.com/performing-coding/ ). We were using a Windows 10 Laptop running Madmapper and Kodelife. While there is little documentation on Kodelife, it is very intuitive if you understand the world of GLSL and live creative coding. Simply put, GLSL is a shader language that runs directly on the GPU. Skip the 4-hour blender or After effects rendering queue and process visuals in real time. Change a few lines of code and tweak them as you go. This style of VJing offers some big live performance pros and cons. And as time goes on, it will only get better.
Whether you know it or not, a good number of VJ and projection mapping applications have been making use of GLSL shaders for years. VDMX, for instance, has their brand of shader called and ISF. Modul8, Madmapper, Resolume, etc. The pro’s of GLSL is in the performance possibilities. Here’s a youtube video that rendered out in real time and its executable file size is tiny in comparison to the capture video size. The downside is you can change a line of code and end up with a VJ blank screen of death (VBSOD).
https://www.youtube.com/watch?v=ccef-qnAzD0
Char and I wanted to collaborate, and what better way then for both of us to share our VJ feeds with one another. I get her’s, and she’ll have mine. Allowing both of us to do our own thing or tweak each other’s feed. This process led to some visceral results but took a few trials runs to get it all figured out. Our setup looked something like this:

Using a combination of NDI, Syphon, Spout, and a USB 3.0 HDMI capture device we could share our feeds, loop them, and mix/blend/mash all of the above.
Here was one hurdle we had to tackle. Kodelife -> to Spout -> to NDI. Kodelife works with Spout (PC) & Syphon (Mac) natively which is immensely helpful for sharing its real-time graphics output on the same machine. But when you want to share it with another computer, two options are an Ethernet cable or an HDMI capture box. (I’ve written about these boxes here: link ) For this, we did both, but either or would have worked. The problem was that the Spout to NDI .exe application needs reset when you open up another Kodelife shader ( or scene ). My MacBook Pro with VDMX & Madmapper could easily import the feed from Char’s PC running Kodelife, but every time the scene would change, the NDI connection would get dropped. This is where the magic of Madmapper came in. Madmapper imports spout & Syphon natively. So when Kodelife is running, madmapper see’s Kodelife’s Spout or Syphon output. Madmapper also has NDI send and receiver built-in. And even better, 1 Madmapper license is good for up to two machines. By using madmapper -> NDI over ethernet to my Mac also running Madmapper, we were able to workaround the issue of the Spout to NDI windows program reset. Madmapper sends a signal as long as the application is open.
So Char’s Kodelife -> Spout -> Madmapper -> NDI -> over an ethernet cable -> to my Macbook pro running Madmapper -> VDMX -> back to my Madmapper -> out to a projector, was a huge chunk of our setup. While this may seem congested, there was little to no latency from this process. From laptop to laptop you can use a single CAT6 ( CAT5 will work ) to share visuals back and forth. We also used my Roland 4 input HDMI mixer as a hardware device that could select either of our feeds and override the output to the projector. So if Char wanted to run the show, she could slide a lever and take control. Vice versa, but this also gives us the ability to work with more VJ’s or bring in live camera feeds, feedback loops, etc. (Enter -> Altared II on 3.31.2018 🙂 Char, ProjectileObjects, and Nate Cake will all be VJing together using this setup. By adding a router or switch into the mix, Nate will be able to share his NDI output from Modul8, the VJ software that he likes to use.
It’s a blessing to be able to collaborate with such remarkable individuals. Thankfully the technology continues to evolve to make that more possible. Thanks to Char Stiles, Hexler.net <- the makers of Kodelife. Madmapper, VDMX, and all the individuals who made this whole process possible.

1 Comment
Char · July 18, 2018 at 12:15 pm
The other part of this diagram (rightfully not in there) is a third projector that was for projecting my code which was connected to my Mac laptop which was grabbing the screen of my phone (via QT) which had the camera app on pointed at the PC screen. it’s a super hack mcgee.
Comments are closed.